PC Oscilloscopes: I Can Really Build My Own?

PC Based Oscilloscopes are a great way to display your electronic measurements on to your computer screen. They offer all of the same functions that a traditional bench top Oscilloscope offers, except that they allow you to display your waveforms and readings on a computer instead of a CRT. Now what would you think if I told you that not only are these new Technological wonders very affordable, but now you can build one of these PC Oscilloscopes yourself. Many of us think of Electronic Kit building as a thing of the past, and certainly the thought of building something like an Oscilloscope just doesn't seem possible these days.

Iron Solder

Well think again, because now there are PC Oscilloscope kits available that offer the same great functions as manufactured PC Oscilloscopes. Features like Step markers for voltage, time and frequency, digital displays, data storage, portability and more. They make a great additional to any Electronic Technicians or Engineers tool box, and there is nothing that gives you more pleasure than knowing that you have created something with your own hands.

Iron Solder

Building these PC Oscilloscope kits is actually quite easy and these kits don't require you to be an expert to build. If you have a basic knowledge of Electronics, soldering and the ability to identify Electronic components, you can build one of these kits. Step by step instructions are included taking you through every step of the building process. You will also find all of the necessary components and other parts required to build the kit. The only thing you will need to supply is your time.

If building a PC Oscilloscope is something that you are considering then you should make sure that you have these basic tools on hand before you start your project: A 25 watt Soldering Iron, a Solder Sucker, Needle Nose Pliers, Solder, a Work Light with magnifier and Cutters. A nice set of Precision Screwdrivers would be helpful as well.

Make sure you have a work space that allows you ample space to lay your parts our and give you enough room to work on your kit. Having adequate lighting to work on your project is a must especially when working with small parts. Take into consideration where you decide to work on your project as well. A kit of this size is something that you will most likely not finish in one evening. So make sure your work area will be safe and out of the way from high traffic areas.

PC Oscilloscope Kits are a great way for anyone to learn about Electronics. They not only provide hours of enjoyment , but offer great hands on learning about electricity, Ohms Law, resistors, capacitors, current, voltage, sensors, IC's and more. Best of all they give you the confidence and satisfaction of knowing you created something yourself.

PC Oscilloscopes: I Can Really Build My Own?
Iron Solder

Christmas Sales American Terminal AT-31604 60-40 Rosin Core Solder (4 Ounces) 201

Dec 19, 2011 22:17:14

Christmas American Terminal AT-31604 60-40 Rosin Core Solder (4 Ounces) Deals
Click for larger image and other views

American Terminal AT-31604 60-40 Rosin Core Solder (4 Ounces)

>> Click here to update Christmas prices for American Terminal AT-31604 60-40 Rosin Core Solder (4 Ounces) <<

Christmas Sales American Terminal AT-31604 60-40 Rosin Core Solder (4 Ounces) Feature

  • Fine electrical soldering
  • 60-Percent tin and 40-percent lead
  • 376 Degree F melting point
  • 0.062 Diameter. 4-Ounce


Christmas Sales American Terminal AT-31604 60-40 Rosin Core Solder (4 Ounces) Overview

This spool of American Terminal AT-31604 Solder contains 4 ounces of 1/16" solder with a leaded rosin flux core. The 60% tin, 40% lead combination is perfect for jobs like fine electrical soldering which requiring lower melt temperatures.


SAVE NOW on Christmas Sales Offers below!

Available In Stock.

This Christmas American Terminal AT-31604 60-40 Rosin Core Solder (4 Ounces) ships for FREE with Super Saver Shipping.

Price : Click to Check Update Prices Please.

American Terminal AT-31604 60-40 Rosin Core Solder (4 Ounces)

Limited Offer Today!! American Terminal AT-31604 60-40 Rosin Core Solder (4 Ounces) Christmas and Cyber Monday 2011 Deals

Panasonic Microwave Oven

The How to on Creating Lariat Art

In 1998, a friend who team ropes, gave me a basket made from his used lariats. I had never seen anything like it. It was great! You could put a plant, pens, or the five remotes that sat on top of my TV in it. After receiving this basket, I was determined to create my own lariat items.

Iron Solder

I have used many ways to hold the rope together, such as hot glue and a propane torch. I can tell you the best way is with a soldering iron. An iron with a wide tip, and heats up to 750 degrees is the best. You do not want the iron too hot; it will unravel your rope, especially if you have a real crisp one. With 750 degrees, the rope melts gradually and you can work with it better. Oh, and you might want to purchase welding gloves, sometimes your hand will slip and well, it hurts!

Iron Solder

One lariat is usually 32 to 35 feet long. I can make a small basket with one lariat. Dimensions are about 8 inches diameter x 6-7 inches high. At one end of the rope there is a hondo, at the other end, a tassel. Take either end to start with, make a loop and where the rope meets take your soldering iron and seal the seam. You are basically melting the rope together and it creates it's own glue. There is smoke produced, so I recommend doing this outside for the smoke is a bit toxic. You can repeat your melting in a couple inch intervals or one continuous line. You will notice that with inch intervals it creates a pattern down your basket, which is nice. When you get a few loops into your basket, try to judge the amount of rope it will take to make the bottom of your basket. You will want to save a foot or so of the end of the lariat to add to the top of your basket. You connect the tassel into the hondo for a complete look.

Then, get creative! Add conchos, feathers or make a design on the outside with your soldering iron. The possibilities are endless. Experiment with shapes as well. Of course they will be roundish, just because of the natural bend in the rope, but you can start small at the top of your basket and widen out or start wide and end narrow, like a vase.

The How to on Creating Lariat Art
Iron Solder

Christmas Sales Weller P2KC Professional Self-igniting Cordless Butane Soldering Iron Kit 201

Dec 19, 2011 00:36:46

Christmas Weller P2KC Professional Self-igniting Cordless Butane Soldering Iron Kit Deals
Click for larger image and other views

Weller P2KC Professional Self-igniting Cordless Butane Soldering Iron Kit

>> Click here to update Christmas prices for Weller P2KC Professional Self-igniting Cordless Butane Soldering Iron Kit <<

Christmas Sales Weller P2KC Professional Self-igniting Cordless Butane Soldering Iron Kit Feature

  • Tips and accessories screw on easily
  • Includes complete kit
  • Soldering tips are iron plated for long life
  • Gas capacity allows up to 1 hour of continuous use
  • Automatic cut-off switch when cap is inserted


Christmas Sales Weller P2KC Professional Self-igniting Cordless Butane Soldering Iron Kit Overview

The new Portasol® cordless soldering tool from Weller® gives you the ultimate in portable power and convenience for all your soldering jobs. Slide the fuel button forward, press the piezo switch, and the tool's super-fast heat-up lets you melt solder in under a minute. The Portasol® cordless soldering tool is powerful too, adjusting from the equivalent of 25 to 75 watts for temperatures up to 850°F. Refueled with standard butane in just 20 seconds, the Portasol® P2C lasts for up to an hour of continuous use. Kit includes tool with five tips (PPT6 3/32" double flat soldering tip, PPT12 flame tip, PPT10 hot knife tip, PPT9 hot air tip, and PPT11 hot air deflector tip), sponge and tray, tool holder, storage case, and instructions. Mfg. #P2KC. Replacement tips available.


SAVE NOW on Christmas Sales Offers below!

Available In Stock.

This Christmas Weller P2KC Professional Self-igniting Cordless Butane Soldering Iron Kit ships for FREE with Super Saver Shipping.

Price : Click to Check Update Prices Please.

Weller P2KC Professional Self-igniting Cordless Butane Soldering Iron Kit

Limited Offer Today!! Weller P2KC Professional Self-igniting Cordless Butane Soldering Iron Kit Christmas and Cyber Monday 2011 Deals

Bob Stroller Surfboard Cookie Cutter

Weller WM120 12w/120v Pencil Thin Soldering Iron

Christmas Sales Weller WM120 12w/120v Pencil Thin Soldering Iron 201

Dec 17, 2011 19:25:21

Christmas Weller WM120 12w/120v Pencil Thin Soldering Iron Deals
Click for larger image and other views

Weller WM120 12w/120v Pencil Thin Soldering Iron

>> Click here to update Christmas prices for Weller WM120 12w/120v Pencil Thin Soldering Iron <<

Christmas Sales Weller WM120 12w/120v Pencil Thin Soldering Iron Feature

  • Lightweight, pencil thin soldering iron with stay-cool handle
  • Designed for soldering miniature components
  • Develops tip temperature of 800 Degree F
  • Comes with 6 foot cord and 3-wire grounded plug
  • Made in Mexico


Christmas Sales Weller WM120 12w/120v Pencil Thin Soldering Iron Overview

WM120 Thin Pencil Soldering Iron 12W miniature, lightweight, pencil thin soldering iron. Weighs 7 oz. and measures 7" less tip. Tip temperature of 800°F. Uses MP series tips. (USA)


SAVE NOW on Christmas Sales Offers below!

Available In Stock.

This Christmas Weller WM120 12w/120v Pencil Thin Soldering Iron ships for FREE with Super Saver Shipping.

Price : Click to Check Update Prices Please.

Weller WM120 12w/120v Pencil Thin Soldering Iron

Limited Offer Today!! Weller WM120 12w/120v Pencil Thin Soldering Iron Christmas and Cyber Monday 2011 Deals

Samsung Led 1080P Visor Lcd Screen Logitech Alert

Sulfur Water Filters - Get Rid of the Bad Smells

Many people have a problem with sulfates in their water. Sulfates are a combination of sulfur and oxygen and are a part of naturally occurring minerals that dissolve over time and are released into groundwater. From there of course, it makes its way into our homes and through our faucets. The presence of hydrogen sulfide is not necessarily a health risk. However it is a nuisance as it has a distinctive rotten egg smell and bitter taste, can cause scale buildup in our pipes as well as have a laxative effect on us. The sulfur can be eliminated with a good sulfur filter through several different methods.

Iron Solder

Choosing which treatment method and filter you need will depend on many factors including:
o the level of sulfate
o the amount of iron and manganese
o if bacterial contamination must also be treated
o how much liquid you need to treat

Iron Solder

For treating small quantities of h2o (for example drinking and cooking only):

o Most common methods would be through distillation or reverse osmosis.

Distillation:

o This method is used by boiling water to form steam, followed by cooling and then recondensing

Reverse Osmosis:

o Most common type of sulfur filters for under sink filtration systems. This method is very effective to completely clean your water. Excellent if your h2o is full of many contaminants. It will however also remove all of the good minerals that your body needs. So if you chose this method, be sure to supplement with trace minerals from a health food store.

For treating large quantities (for example whole house systems):

o Most common method would be ion exchange.

Ion Exchange:

o Ion-exchange resin which is contained inside the unit will absorb the sulfate. The resin must be regenerated with a salt brine solution consistently.

There are many different sulfur water filters to choose from. Two of the best on the market right now are Aquasana and Crystal Quest. A little shop and comparison online will help you to find the exact one that will fit your needs. Sulfur is easily removed with a good filter and you will find that your water will taste better and smell better, as well as be safer to drink.

Sulfur Water Filters - Get Rid of the Bad Smells
Iron Solder

Entertainment Projector

Repairing Cracked Motorcycle Plastics

As if tipping over your motorcycle in a parking lot didn't make you feel stupid enough, learning the plastics damaged in the 0 mph crash will cost hundreds of dollars to replace will reaffirm your belief in an unjust world. While repairing the ABS plastic found on motorcycle fairings is straightforward, the plastic tends to break at the weakest point and if the point was weak when it was new, the fixed plastic will be a patch. Start by removing any stickers that cover the damaged plastic. A blow dryer will help loosen the glue.

Iron Solder

Then, drill a small hole at the end of the crack to relieve pressure and stop the crack from spreading. Next we use a rotary tool to cut a V-notch 5 millimeter wide on the underside of the fairing to give more surface area for the adhesive to attach the two halves of the fairing. Notching on the underside of the fairing helps hide the repair. Next we use a degreaser like Simple Green to clean the plastic of any oil residue or chards of plastic. If the crack is small consider using a two-part plastic epoxy, like the one's that resemble two hypodermic needles, to adhere the plastic together. For bigger cracks we will have to use a soldering iron and melt ABS plastic rods, like the kind sold at Harbor Freight, into the V notch we cut. The key is to get the soldering iron hot and feed but don't force plastic rod into the soldering iron, working the plastic into the puddle. Take your time and work methodically to get melted plastic completely into the cut notch. If the crack is severe it will require bracing that can be made by cutting strips of plastic and adhering the plastic with epoxy across both sides of the crack.

Iron Solder

When you have finished soldering the crack, clamp the fairing to let the solder settle and/or the epoxy cure to full strength. Afterwards we take fine grit sandpaper, 400 or above, add a little water and begin sanding the repair until the plastic is smooth. Consider a second sanding with 600-grit sandpaper to further smooth the repair. To add some class to the repair, add a dollop of acrylic gloss to give the plastic back its sheen. Conceal your repair under a new sticker if you had to remove one or leave it exposed so people know it's a scar with a story.

Repairing Cracked Motorcycle Plastics
Iron Solder

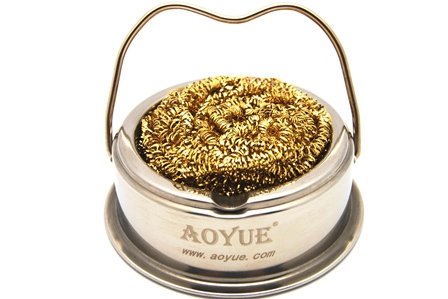
Christmas Sales Aoyue Soldering Iron Tip Cleaner with Brass wire sponge, no water needed 201

Dec 16, 2011 01:18:57

Christmas Aoyue Soldering Iron Tip Cleaner with Brass wire sponge, no water needed Deals
Click for larger image and other views

Aoyue Soldering Iron Tip Cleaner with Brass wire sponge, no water needed

>> Click here to update Christmas prices for Aoyue Soldering Iron Tip Cleaner with Brass wire sponge, no water needed <<

Christmas Sales Aoyue Soldering Iron Tip Cleaner with Brass wire sponge, no water needed Feature

  • Cleans Tip without Messy Wet Sponges
  • Uses Low abrasive Brass, no water needed
  • Works with any tip
  • Heat resistant Stainless Steel Case
  • lengthens tip life by reducing oxidation


Christmas Sales Aoyue Soldering Iron Tip Cleaner with Brass wire sponge, no water needed Overview

Cleans your soldering iron tips without water and is faster and better than a sponge! Made from coils of brass, which are softer than the tip plating yet hard enough to lessen oxidationTo clean the tip, simply plunge the iron tip into the coils. This cleans better than a wet sponge and won't reduce the tip temperature.


SAVE NOW on Christmas Sales Offers below!

Available In Stock.

This Christmas Aoyue Soldering Iron Tip Cleaner with Brass wire sponge, no water needed ships for FREE with Super Saver Shipping.

Price : Click to Check Update Prices Please.

Aoyue Soldering Iron Tip Cleaner with Brass wire sponge, no water needed

Limited Offer Today!! Aoyue Soldering Iron Tip Cleaner with Brass wire sponge, no water needed Christmas and Cyber Monday 2011 Deals

7 Tft Lcd Touchscreen Kitchenaid Immersion Blender Electric Griddle

Antique Gun And Powder Flask Repairs

In good condition, these guns are valuable antique collectors' pieces. Others that require a bit of work can often be cleaned and restored by amateurs. Cast-metal parts or wooden blanks, which can be shaped to replace damaged or missing stocks, can be obtained from specialist suppliers. Even old gunpowder explodes, so be sure that any gun being repaired is not loaded. Insert the ramrod, or a length of wood, into the barrel to check if there is any obstruction. If there is, remove it with a modern shotgun-cleaning rod that has a screw tip, or use an ordinary steel screw soldered to a stiff piece of wire. Screw the rod gently into the obstruction and pull it out like a cork. Wash the barrel with hot water and dry it.

Iron Solder

To dismantle the gun, first half-cock it, then remove the screw which holds the cock (in the flintlock) or the hammer (in the percussion type) and slide it off. Unscrew the pan-cover pivot and screw securing the spring beneath the pan: remove the parts. Unscrew the holding bolts or screws and remove the lock-plate. Several screwdrivers may be needed: the blade must fit each screw or bolt slot exactly so as not to burr the screw or bolt. If they are hard to remove, applying a bit of penetrating oil will do the trick. To dismantle a flintlock mechanism, loosen the four screws that hold the mainspring, sear, searspring and the bridle. Compress the mainspring (in a small hand vice), take out the spring screw and remove the spring. The pin at the rear of the mainspring engages in the lock-plate and the other end of the spring engages in the toe of the tumbler.

Iron Solder

Remove rust with fine emery paper or powder. Make sure to remove all abrasive powder after cleaning. Smear all parts with petroleum jelly and reassemble. Press the tumbler down to the fired position so that the end of the mainspring goes over it. Put the cock on and pull it back to the half-cocked position so that the tumbler toe compresses the mainspring. Refit the rest of the pieces in reverse order to removal.

To clean the barrel, first remove it from the stock. A metal extension of the barrel - the tang - runs into the stock. Remove the tang screws and any retaining bands or pins. The trigger guard, butt cap and ramrod pipes are screwed or pinned and must be removed with extreme care. If the screws do not yield to penetrating oil, leave them alone - it will be a job for an antique restorer to drill them out. Barrels and other metal parts can be cleaned with a mixture of oil and paraffin. Re-polish all parts with progressively finer abrasives; finish with jewellers' emery or crocus paper. Some barrels may have been blued to prevent rust and, special bluing fluid can be bought from a gunsmith. Try not leaving fingerprints on the barrel as this causes rusting.

Clean the stock with steel wool and linseed oil. If the stock is broken, mend with epoxy resin mixed to a paste with matching stained sawdust. If the stock is beyond minor repairs, a new stock may be fashioned with an entirely new piece of wood. Small dents in the stock can be extracted by using hot steam from an iron. Place a cloth over the dent and apply the hot iron.

Powder flasks were made in hundreds of designs and several materials. However, the majority of antique flasks were made pear-shaped and made from tin, brass or Britannia metal. Metal flasks were usually made in two halves soldered together. If the seam has parted, find out what alloy the flask is made of before trying to re-solder it. A simple test is to put a few drops of water in a cup and add an equal number of drops of nitric acid, obtainable from a chemist. Put a drop of the solution on the metal to reveal the colour. Red-brown indicates bronze; yellow and yellow-red, brass; dark grey, pewter; and bright silver-grey, Britannia metal. To polish the antique flask, use the technique appropriate to the material it is made of. Many powder flasks have very fine detailed etchings, embossings or engravings that give them their unique look. An antique gun without its matching or specific powder flask loses its appeal when antique collectors are looking to add to their collection.

Antique Gun And Powder Flask Repairs
Iron Solder

Battery Power Tools Bench Saw Inversion Therapy Table

Tips to Install Mod Chip on Your Playstation2

PlayStation2 is a fine gaming console. It is slim and light-weight which enables the gamers to carry it around wherever they travel.

Iron Solder

PlayStation2 amazes its users with its built-in Ethernet and modem ports which essentially mean that the users can take advantage of the online gaming as well. What makes PlayStation2 a phenomenon among the game addicts around the world is its ability to push the realm of entertainment with features that bring the gamers to the unpredictability of live competitions.

Iron Solder

Millions of PlayStation2 are connected online almost every time; this basically means that the gamers have always someone to play against. The best part, however, is its ability to combine friction, gravity, and environmental elements to create astoundingly real physical simulations offering its users an experience of a life time. With the help of high-resolution 3D graphics, DolbyDigital AC3, and DTS sound capabilities, the entire experience of video gaming takes the users to a new zone.

If you are video game addict, PlayStation2 is the ultimate gaming console for you. Any serous gamer would swear by it and shell out anything to own it. However, you should know the ins and outs of using the PlayStation2 gaming console before it is ready for the game.

Generally, users of PlayStation2 ask about the installation of Mod Chip. Although, it is not too hard to install a Mod Chip on your PlayStation2, you need to have a little hands-on knowledge on electronics and soldering iron. Alternatively, you can buy one of those pre-modded PlayStation2 systems that are easily available online. Usually, pre-modded PlayStation2 systems cost a little higher due to the fact that they come with a life-time warranty on the installation.

In any case, if you want to install the mod chip on your PlayStation2 system all by yourself, the following tips would be immensely helpful to you.

Use the right chip:

There are 16different versions of playstation2 model available and each of the model require unique type of Mod chip. for installing the right Mod chip into your playstation2 first find out the version that you are using. You can make a search in Google to find the PS2model numbers and the chip compatible with it. or else you can purchase the universal PS2 Mod chip that works well with any version of PS2.

Use right soldering iron:

While installing the PS2 Mod Chip you have to solder a small section of the motherboard. For that you need a soldering iron that has a small, fine tip. The soldering iron that is rated at 15 watt will provide enough heat for soldering without hurting the PS2 console.

Use solder with flux in it:

Many people do the mistake of buying flux separately while buying solder. But it may lead to unwanted use of flux and you may have to re-solder it in later date. But a solder with a flux helps the solder to attach to the wires and the solder points.

Use short wires:

While using Mod chip you are actually transferring the data and information to the motherboard of the PS2. It will be better if the data or information are covering less distance. If you are installing the Mod chip to the PS2, keep the wires as short as possible o avoid complexity.

Use 15 AWG wrapping wire:

The installation of the Mod chip into a PS2 console is sometimes spoiled due to the mere problem of choosing the wrong kind of wrapping wire. If the wire is too thick it may create difficulty while attaching it without touching any other part. The 15 AWG wrapping wire is the ideal one for the purpose.

Tips to Install Mod Chip on Your Playstation2
Iron Solder

Trunk Mount Rack 32 1080P Led Hdtv

Lead Free Solder - Some of it's Characteristics and Problems and How to Deal With Them - RoHS

Since the RoHS legislation came into force in Europe the nature of electronics manufacturing, and soldering in particular has changed forever. RoHS compliance and lead free solder presents many new challenges to businesses involved in pcb manufacturing.

Iron Solder

No-one seriously disputes that lead free solder is healthier for everyone involved in pcb assembly, but unleaded solder does present certain problems. Lead free solder does not flow as easily as leaded solder and the soldered joints on a pcb board look different on a leaded board, when compared to a board built using lead free solder.

Iron Solder

The first thing you will notice is the lack of top fill on your through-plated pcb boards. It is rare to get more than a 75% fill on your pcb boards.

The second thing you will notice is that your lead free solder joints are not as shiny as the old style leaded joints that you will have been used to. This is simply down to the actual mix of lead free solder and should not be a cause for undue concern.

Does lead free solder melt at the same temperature as leaded solder?

No! Unleaded solder will melt at a higher temperature, the exact temperature will vary depending on the solder mix you choose to use. One common mix is 99% Tin, Copper 0.7%, and Silver 0.3%. This melts and flows without much difficulty at 275 degrees.

Preparing to use lead free solder for the first time.

Who has to use unleaded solder?

Almost all electronics assembly will have to be done using lead free processes. (See my article on RoHS compliance for more details).

What about soldering equipment?

It is very likely that most of your soldering equipment will need either replacement or adjustment to prepare it for lead free service.

At the very least your soldering irons will require new tips to avoid contamination issues, and you may find that you need to replace the entire soldering iron if you find it has trouble reaching the new higher temperature that is required for lead free soldering.

Bigger soldering equipment such as a wave soldering machine will probably need to have their soldering baths replaced and you may want to consider replacing the flux you use, as the pcb boards that you will now be soldering will be lead free as well.

Solder pots and other hand operated solder equipment can either have their baths replaced, or for a cheaper option you could try emptying them of solder, cleaning the bath, and coating it with a layer of oxide paint. Once it is dry you can fill your bath with new lead free solder and you are ready to start soldering again.

Lead Free Solder - Some of it's Characteristics and Problems and How to Deal With Them - RoHS
Iron Solder

Christmas Sales Sinometer 30 Watts Soldering Iron, UL listed 201

Dec 13, 2011 08:42:10

Christmas Sinometer 30 Watts Soldering Iron, UL listed Deals
Click for larger image and other views

Sinometer 30 Watts Soldering Iron, UL listed

>> Click here to update Christmas prices for Sinometer 30 Watts Soldering Iron, UL listed <<

Christmas Sales Sinometer 30 Watts Soldering Iron, UL listed Feature

  • Long life replaceable tip
  • 30 Watts and UL listed
  • Stand included
  • Impact resistance handle
  • 30 days money back guarantee and 1 year limited warranty


Christmas Sales Sinometer 30 Watts Soldering Iron, UL listed Overview

This professional 30 watt soldering iron features a replaceable tip, ergonomically designed cool grip rubber handle, and a nickel-iron plated long life copper tip. It provides an operating tip temperature of up to 430 F with fast heating time and quick heating recovery. 120 VAC.


SAVE NOW on Christmas Sales Offers below!

Available In Stock.

This Christmas Sinometer 30 Watts Soldering Iron, UL listed ships for FREE with Super Saver Shipping.

Price : Click to Check Update Prices Please.

Sinometer 30 Watts Soldering Iron, UL listed

Limited Offer Today!! Sinometer 30 Watts Soldering Iron, UL listed Christmas and Cyber Monday 2011 Deals

1080P 42 Hdtv First Years Stroller

Five Tips For Excellent Iron On Transfers For T-Shirts

It's obvious that iron on transfers for t-shirts are really the next best things in fashion. With a fantastic design, you can look your best while remaining entirely original. There are now a couple of services that offer designing and ironing services. Before you settle for any single service option, get a load of some great tips that'll ensure you'll get the best designs for your shirt.

Iron Solder

#1- Try crystals for individuality.

Iron Solder

Traditional transfer designs take on the form of colored designs that stick on fabric. These are actually quite attractive in themselves but if you want to look even flashier, crystal designs are the best way to go. You definitely can't fail to get some heads to turn on the street with a loud, sparkly design that reflects your personality. You can even announce your personal style even more by going for full custom iron on transfers.

#2- Go for Swarovski for small orders.

The best type of crystals to settle for is the Swarovski type. This type was specifically created to look a lot like diamonds so there's no doubt you will sparkle in a customized shirt. Swarovski crystals look so real, you might not be able to tell them apart from actual diamonds.

Depending on the ironing service you choose, color options can include gold, amethyst, ruby, peridot and emerald. The most popular however, is still the clear crystal option.

Because Swarovski crystals look a lot like diamonds, they are a bit expensive. They are therefore really best choices if you only plan to order a handful of iron on transfers for t-shirts.

#3- Go for rhinestones for bulk orders.

You might be interested in styling more than just one shirt. If you need custom designs for hundreds of shirts for an event or promotional campaign, you might just want to settle for rhinestones. Although these don't look as flashy as Swarovski crystals, they are still quite attractive and are truly the most economical options for bulk orders.

#4- Look for custom options.

Most service providers have pre set designs that you can choose from. You should however, really much rather go for a seller that can give you a selection of custom design choices. Some let you decide on font styles and design colors. The very best services however allow full customization so you can submit a completely original design.

#5- Look for fabric options.

Many service providers don't just focus on making transfer designs. They can also deliver completely ironed out designs on shirts. This is an excellent extra service feature for you especially if you are ordering for a big event. After placing an order, all you need to do is to wait for the shirts to arrive. Look for a service provider with many different fabric and shirt style options.

Stylish iron on transfers for t-shirts can really make you stand out from the crowd. That is however, only if you choose the right transfer options and service provider. Keep these essential tips in mind before placing an order for your designs to make sure you get only the best results.

Five Tips For Excellent Iron On Transfers For T-Shirts
Iron Solder

42 Inch Vizio Lcd Hdtv Widescreen Computer Monitors Vitamin Fish Oil

Building A Battery Desulfator Is Easy

I'm sure you know that there are ways to recondition batteries which returns them to 100% working condition and they work like new again. So, how exactly does this reconditioning process work? What exactly happens which makes your old batteries work like new again? What exactly do you need to do to recondition a battery? Do you simply plug it into a charger and wait for it to become reconditioned? Keep reading to find out.

Iron Solder

Batteries have been in use for quite some time now. The most popular kind are lead-acid batteries (which are most commonly used in cars). After being used or if they've been in storage you'll notice that they don't hold a charge anymore. There's not actually anything wrong with the battery they've just built up sulfate crystals on the lead plates which prevents them from charging fully. In order to make your battery work again all that's needed is to remove these crystals from you battery using a process called desulfation.

Iron Solder

There are quite a few battery desulfators that you can buy, and any of them will work for battery recondition; however, they can be quite expensive. Luckily there is a cheaper alternative by building a battery desulfator. One thing I can't stress enough. When working with batteries make sure you wear protective eyewear and gloves.

Here's what you're going to need for this project:

A small container
Electrical Tape
Prototyping board (perf board, can be found on eBay)
transistor
2 switches
2 resistors
2 pots
2 LED
wire
Solder and soldering iron
Capacitors

The first thing you need to do is cut the perf board so that it fits nicely inside the tin and than attach the copper foil to the underside of the board. Arrange the components on the board so that they can all be connected together (a schematic from a Battery Recondition Guide is recommended as it will help tremendously). Once everything is arranged and connected solder the joints (which is pretty easy). When you're finished use the double sided tape as insulation on the underside of the board.

Now you need to drill a hole in the left side of the can. You're also going to need to drill three holes in the right side of the can and one hole in the lid. The left side hole is where the output wires go, the hole in the lid is so you can see the LED without having to open the lid and the right side holes are the input wires.

Once you've attached the wires to the perf board you're now ready to put your battery desulfator to the test. You've also had a crash course in building a battery desulfator. Enjoy the savings of reconditioning batteries yourself!

Building A Battery Desulfator Is Easy
Iron Solder

Christmas Sales Hakko Tip Cleaner, 599B-02, Non-Corrosive, No Water Needed 201

Dec 11, 2011 14:31:54

Christmas Hakko Tip Cleaner, 599B-02, Non-Corrosive, No Water Needed Deals
Click for larger image and other views

Hakko Tip Cleaner, 599B-02, Non-Corrosive, No Water Needed

>> Click here to update Christmas prices for Hakko Tip Cleaner, 599B-02, Non-Corrosive, No Water Needed <<

Christmas Sales Hakko Tip Cleaner, 599B-02, Non-Corrosive, No Water Needed Feature

  • "shell" design keeps the solder from splattering
  • Will not reduce the tip temperature
  • A great alternative to the conventional damp sponge
  • No mineral buildup or oxidation as occurs with soldering iron sponge
  • May be used as a portable tool holder and cleaner


Christmas Sales Hakko Tip Cleaner, 599B-02, Non-Corrosive, No Water Needed Overview

Cleans your soldering iron tips without water! Made from coils of brass, which is softer than the tip plating yet harder than the oxidation that forms on the tip. To clean the tip, simply plunge (stab) the iron tip into the coils. The ideal alternative to a wet sponge.


SAVE NOW on Christmas Sales Offers below!

Available In Stock.

This Christmas Hakko Tip Cleaner, 599B-02, Non-Corrosive, No Water Needed ships for FREE with Super Saver Shipping.

Price : Click to Check Update Prices Please.

Hakko Tip Cleaner, 599B-02, Non-Corrosive, No Water Needed

Limited Offer Today!! Hakko Tip Cleaner, 599B-02, Non-Corrosive, No Water Needed Christmas and Cyber Monday 2011 Deals

Receivers 5.1

Edge Beading A Stained Glass Copper Foil Project

Edge beading is pretty simple once you get the hang of it. Just remember that every edge has three surfaces...the front surface of the edge, the back surface of the edge, and the outside edge which you see when you hold the panel vertical/perpendicular to your work surface. You are going to put solder on all 3 surfaces of the edge...front, back and outside edge.

Iron Solder

Start by fluxing the front surface of the edge. Hold your iron so the tip faces the outside and your hand and the rest of the iron are over the glass. If you hold the iron from the outside facing in, most of the solder will run off due to the heat of the iron pulling the solder down. Go along and run solder on the front surface. Turn the panel over and repeat the above instructions on the back surface of the edge. Some solder will run over the edge on both sides. Do not worry about it, and do not worry about making the front and back surfaces perfectly smooth. When you are finished, all 3 surfaces will be smooth and round.

Iron Solder

Finally, turn the panel so the edge is facing up (vertical to your work surface). I usually use Wedgies to hold it in position. Wedgies are wonderful little wedges made specifically for stained glass work. They hold your panels, lampshades, just about anything in position for soldering.

However, if the panel is round or oval, you will be constantly moving it so the spot you are working on is absolutely parallel to your work surface. If you tip it too far forward or backward, even just a little bit, the solder will run in that direction rather than staying put and forming a bead. If you are going to hold the panel in your hand while you bead up the edge, be sure to wear protective gloves, or hold the panel with a towel that will drape over your hand and arm to prevent burns from falling hot solder.

Flux the outside edge and using a touch and lift motion go along the edge with your soldering iron. There is usually enough solder that has run over from the front and back, so you will not have to apply any more. If there is not enough, add it wherever needed. Work along the edge slowly. The solder on all 3 surfaces will round up and give you a nice bead.

The touch and lift motion consists of touching down into the solder, all the way to the foil. As soon as the solder melts and flows, gently lift all the way out of it and touch down again close enough to the last touch so the iron is on the edge of where you last touched down. You will find a rhythm to it once you get comfortable with the technique.

When you have finished the outside edge, have a look at the other two surfaces just to make sure there are not any places that need fixing up. Ninety nine percent of the time, all three surfaces will be round and smooth after you have done the final touch/lift technique.

Edge Beading A Stained Glass Copper Foil Project
Iron Solder

2.5 Media Player Samsung Lcd 1080P Hdtv 3D Projector

Solder Flux Paste - Wholesale Dropshipping - Siting One Brand That is a Lead-Free Solder

Lets take a peak first on how a lead could manage to destroy an environment and to human being. There is no really visible damage contribution to it but the effect is through its contribution of elements in the air (specifically the melting copper).

Iron Solder

The impact categories included in the Lead-Free Solder Project [LFSP] and life-cycle impact assessment [LCIA] are as follows: renewable resource use, nonrenewable materials use, energy use, landfill space use, global warming, stratospheric ozone depletion, photochemical smog, air acidification, air particulates, water eutrophication (nutrient enrichment), water quality (biological oxygen demand [BOD] and total suspended solids [TSS]), occupational human health effects (cancer and non-cancer), public human health effects (cancer and non-cancer), and aquatic ecotoxicity.

Iron Solder

Here is a solder flux paste to a least minimize the toxic content of the lead that may cause damage to environment and human body. This is a solder flux paste that can be used on steel, iron, braze, plated-zinc, and plated-nickel soldering for general purposes. Xihan solder flux paste is a product into it. Xihan, is based in Ningbo, Shanghai, China and exports quality solder flux paste to any part of the world. So how can interested buyers contact Xihan? They provide a site on web to contact them and know more about the product. It can be ordered in hundreds for they can accommodate 3000 pieces-per-day order and they never ran out of stock. Worth .6-0.8/pc, you can have them on time.

Impacts from the transportation and distribution of materials, products, and wastes throughout the life-cycle of a solder are included in most of the upstream processes where secondary data are used that already include transportation. Like Xihan, they also make provide time frame in delivery not long enough to wait but not fast enough to surprise you... they consider seven to ten working days delivery time. Data for manufacturing and use/application life-cycle stages reflect the period stated.

Unlike most products, solder does not have a use life-cycle that extends over a large time frame, instead it occurs over the relatively short period of time required to assemble a printed wiring board. And to whatever business anyone ventures, please also understand any risk that takes part of it. No matter what kind of industrial business we are in. Always remember that anything should also be of good service not just to your client but also to the nature, who deserves much credit to our existence.

Solder Flux Paste - Wholesale Dropshipping - Siting One Brand That is a Lead-Free Solder
Iron Solder

Christmas Sales Aoyue Soldering Iron Tip Cleaner with Brass wire sponge, no water needed 201

Dec 09, 2011 19:40:50

Christmas Aoyue Soldering Iron Tip Cleaner with Brass wire sponge, no water needed Deals
Click for larger image and other views

Aoyue Soldering Iron Tip Cleaner with Brass wire sponge, no water needed

>> Click here to update Christmas prices for Aoyue Soldering Iron Tip Cleaner with Brass wire sponge, no water needed <<

Christmas Sales Aoyue Soldering Iron Tip Cleaner with Brass wire sponge, no water needed Feature

  • Cleans Tip without Messy Wet Sponges
  • Uses Low abrasive Brass, no water needed
  • Works with any tip
  • Heat resistant Stainless Steel Case
  • lengthens tip life by reducing oxidation


Christmas Sales Aoyue Soldering Iron Tip Cleaner with Brass wire sponge, no water needed Overview

Cleans your soldering iron tips without water and is faster and better than a sponge! Made from coils of brass, which are softer than the tip plating yet hard enough to lessen oxidationTo clean the tip, simply plunge the iron tip into the coils. This cleans better than a wet sponge and won't reduce the tip temperature.


SAVE NOW on Christmas Sales Offers below!

Available In Stock.

This Christmas Aoyue Soldering Iron Tip Cleaner with Brass wire sponge, no water needed ships for FREE with Super Saver Shipping.

Price : Click to Check Update Prices Please.

Aoyue Soldering Iron Tip Cleaner with Brass wire sponge, no water needed

Limited Offer Today!! Aoyue Soldering Iron Tip Cleaner with Brass wire sponge, no water needed Christmas and Cyber Monday 2011 Deals

Sears Push Mowers

Your Solder Will Not Stick to the Soldering Iron? Try This Solution

The soldering iron probably the common tool which you can find in the most homes in the U.S. The main function of this tool is to melt the hot metal solder onto the joints. The part of the iron which is used to melt the metal is the tip of the iron.

Iron Solder

You may find the people also use the tool for the electronic repair and the joints which have the low power rating. It is better for you to do the proper melting process. You also need to maintain the solder carefully. If you do the improper technique in doing both of them, you may face the difficulty to stick the solder to your iron or to the joint where you will attach it.

Iron Solder

However, if you find the problem, you may solve it by yourself since the difficulty level is quite easily. To do this, you have to prepare the tools like the soldering iron, the solder, the sponge, and water.

The first thing you should do is to heat the tool. Turn on the iron's power by plugging the tool. Wait for the some minutes. It is better if it reaches 400 Celsius degrees. If your iron has the preheated function, you should wait the tool to indicate it.

You should wet the small sponge with the cold water and put it close to the preheating tool. You can check whether the iron is preheated or not by touching the tip to the solder. If the solder is already preheated, the solder will melt.

After that, you need to clean the tool's tip with the sponge. You will need to roll the iron's tip to the solder's piece. This step has the purpose to cover the iron with the solder. This process is called tinning. If you do it properly, your solder will be able to flow to the joint.

Your Solder Will Not Stick to the Soldering Iron? Try This Solution
Iron Solder

Christmas Sales Weller WP35 35-Watt Professional Soldering Iron 201

Dec 08, 2011 22:48:33

Christmas Weller WP35 35-Watt Professional Soldering Iron Deals
Click for larger image and other views

Weller WP35 35-Watt Professional Soldering Iron

>> Click here to update Christmas prices for Weller WP35 35-Watt Professional Soldering Iron <<

Christmas Sales Weller WP35 35-Watt Professional Soldering Iron Feature

  • Ideal For A Wide Variety Of Electronic Tasks
  • Uses St Series Long Life Double-Coated Iron-Plated Tips
  • Tip Temperature: 850°F
  • Quick-Change Knurled Collar and Stainless-Steel Barrel
  • Light Blue With Cushion Grip Handle and Plug-In Heating Element


Christmas Sales Weller WP35 35-Watt Professional Soldering Iron Overview

Product Features: # Ideal for a wide variety of electronic tasks - has ST3 soldering tip # Uses ST series long life double-coated iron-plated tips # Tip temperature: 850°F # Quick change knurled collar - stainless steel barrel # Light blue with cushion grip handle and plug-in heating element # 6' 3-wire cord - iron is 7 7/8 long # IMPORTANT: Use only Weller® tips # UL and cUL listed (120 VAC units only)


SAVE NOW on Christmas Sales Offers below!

Available In Stock.

This Christmas Weller WP35 35-Watt Professional Soldering Iron ships for FREE with Super Saver Shipping.

Price : Click to Check Update Prices Please.

Weller WP35 35-Watt Professional Soldering Iron

Limited Offer Today!! Weller WP35 35-Watt Professional Soldering Iron Christmas and Cyber Monday 2011 Deals

Kolcraft Baby Strollers Kitchenaid Immersion Blender

How to Properly Care For Your Soldering Iron Tip

Your soldering iron can be an indispensable tool for a number of different projects, ranging from home improvement and electronics repair to metalwork and even arts and crafts! But since this tool is a very delicate, highly specialized instrument, it's important to take good care of it - and that's especially true of the tip, the iron's most fragile (and essential) part. In order to properly care for the tip of your iron, keep the following pointers in mind:

Iron Solder

Don't file, grind or otherwise attempt to reshape the tip because it can permanently damage it. Instead, buy a different size or shape that is better suited to your needs. Most manufacturers offer a wide range of soldering iron tip sizes for precisely this purpose. Always use fresh solder on a the tip to clean it before you start to use it. This process is called tinning, and works because the fresh solder will help dissipate any residual oxide covering. When soldering at particularly high temperatures (anything above 665 degrees Fahrenheit), or when you pause your soldering work for longer than an hour, always clean and tin the tip in order to avoid oxidizing the solder. Clean your tip with a synthetic wet sponge only; do not use cloths, rags or other fabrics. The sponge should be wet with distilled water, since the minerals present in tap water can contaminate your tip. Don't rub the tip of your soldering iron on the metals you're attempting to join. Don't add solder directly to the tip itself when connecting wires. Rather, heat the connecting wires so when the solder is applied it melts into place. Use the lowest temperature possible for the project in question. This will help prolong the life of your soldering iron tip. When finished with your iron, don't remove the excess solder from the tip prior to turning it off. This solder will actually help prevent oxidation and protect the delicate tip. Finally, always allow the tip of your soldering iron to cool completely before putting it away in a specially designated storage case or holder.

Iron Solder

How to Properly Care For Your Soldering Iron Tip
Iron Solder

Christmas Sales Sinometer 60 Watts Soldering Iron, UL listed 201

Dec 08, 2011 01:37:19

Christmas Sinometer 60 Watts Soldering Iron, UL listed Deals
Click for larger image and other views

Sinometer 60 Watts Soldering Iron, UL listed

>> Click here to update Christmas prices for Sinometer 60 Watts Soldering Iron, UL listed <<

Christmas Sales Sinometer 60 Watts Soldering Iron, UL listed Feature

  • Long life replaceable tip
  • 60 Watts and UL listed
  • Stand included
  • Impact resistance handle
  • 90 days money back guarantee and 1 year limited warranty


Christmas Sales Sinometer 60 Watts Soldering Iron, UL listed Overview

This professional 60 watt soldering iron features a replaceable tip, ergonomically designed cool grip rubber handle, and a nickel-iron plated long life copper tip. It provides an operating tip temperature of up to 860°F with fast heating time and quick heating recovery. 120 VAC.


SAVE NOW on Christmas Sales Offers below!

Available In Stock.

This Christmas Sinometer 60 Watts Soldering Iron, UL listed ships for FREE with Super Saver Shipping.

Price : Click to Check Update Prices Please.

Sinometer 60 Watts Soldering Iron, UL listed

Limited Offer Today!! Sinometer 60 Watts Soldering Iron, UL listed Christmas and Cyber Monday 2011 Deals

Maxi Cosi Stroller Vitamins Supplements