Making a solar panel on your own is not necessarily rocket science but it is not the simplest of tasks either. However, with the right tools and components and closely following the given instructions, you should be successful in learning how to make a solar panel for your house.
Things needed:
Iron Solder
- Photovoltaic cells
- All the tools in your house
- Spare picture frames
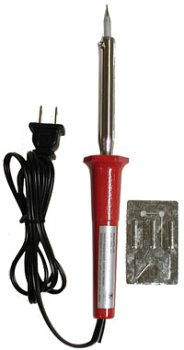
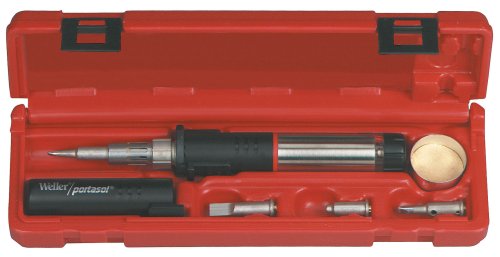
- Soldering iron
- Black and red insulated wire
- Silicone glue
- Glass or plastic cover
- Multimeter
Getting started
Buying the right kind of photovoltaic or solar cell is important. Several types of photovoltaic cells such as crystalline silicon cells and copper indium selenide cells are in the market. They are easy to find at the store and are even available online. The number of cells you need to buy is dependent on how many panels you are going to make and how much electricity you intend to produce from that.
Step 1
The cells you purchased will have lines on one side of them. Place the cells on the plastic or the glass sheet in such a way that the lined side faces the sun. There is another thing you need to know about how you can increase the voltage and the current; placing all the cells on the same wire as a series increases the voltage whereas, placing all the cells in different wires that are connected parallel to each other increases the current.
Step 2
This step is simple science. Any cell or battery has two ends - a positive and a negative. Similarly, the solar cell has positive and negative ends and these ends need to be connected logically to let the current flow through the panel. Hence, the negative side of each cell is connected to the positive side and the same is carried out for all cells. When this is done, solder the cells together by a portion of their tabs using the soldering iron. By the end of doing this, all your cells would be attached in a definite pattern.
Step 3
It is time to frame your solar cells. Stick them with their backs to the frame and slowly remove the plastic or glass sheet. Make sure that no glue falls on the lined sides of the solar cells. Next, all the negative and positive tabs of the cells have to be soldered separately. The negative tabs would now be on the cells' side with lines and the positive tabs would be on the other side. Solder a wire to all the negatives with black insulated wire and all the positives with red insulated wire. Replace the plastic cover. Now you will have two wires hanging out of the system.
Step 4
Now using the multimeter, check the amount of voltage and current passing through your panel and choose any gadgets that share the same energy specifications. If they do, then connect the positive and negative terminals respectively and finally, your brand new solar panel is in use.
Special Price!!! Sinometer 30 Watts Soldering Iron, UL listed
Oct 31, 2011 06:39:20
Click for larger image and other views

Sinometer 30 Watts Soldering Iron, UL listed Feature
- Long life replaceable tip
- 30 Watts and UL listed
- Stand included
- Impact resistance handle
- 30 days money back guarantee and 1 year limited warranty
Sinometer 30 Watts Soldering Iron, UL listed Overview
This professional 30 watt soldering iron features a replaceable tip, ergonomically designed cool grip rubber handle, and a nickel-iron plated long life copper tip. It provides an operating tip temperature of up to 430 F with fast heating time and quick heating recovery. 120 VAC.SAVE NOW on the special offers below!
Available In Stock. |
| This Sinometer 30 Watts Soldering Iron, UL listed ships for FREE with Super Saver Shipping. |
Price : Click to Check Update Prices Please. |


